Wading in Java’s Dependency Hell

It’s more than disappointing that as I write this in 2022, more than a generation since I first worked as a software developer, nearly a century since the first programmable electronic computers, we are still wrestling with things as archane and crude as build files and what the Java community not-so-affectionately calls “dependency hell.”

For the uninitiated, computer programs are written in relatively “high-level” human-readable languages like Java and C, but execute in a low level machine language understandable by a microprocessor. In simple terms, the process of getting from high-level code to executable code is the “build,” and build files are instructions to help govern that process. Dependency hell arises because Java programs are built up from libraries of pre-built components that do everything from manipulating strings to writing the contents of memory out to an application file (like the .docx file produced by Microsoft Word). No developer or team could possibly afford the time or money to implement all these supporting functions from scratch, and libraries provide standardized mechanisms for various entities to develop and support them and make them available to application developers. So far, so good.

The trouble is, over time, code gets written against specific versions of these libraries, and sometimes becomes unintentionally dependent on version-specific bugs or peculiarities. Library ownership changes hands and the new owners decide to clean house, reorganize, or kill existing libraries. Open-source libraries branch into new flavors and those that were once a defacto standard become tomorrow’s orphan, while the new alternatives may be as similar as two sects of the Greek Orthodox Church or as different as Chinese and English. Meanwhile, applications are always being written and maintained, building up every growing and changing rat’s nests of dependency on these various libraries.

Dependency hell.

This is not unique to Java. .Net developers face “DLL hell,” but .Net developers are far more dependent on components written and maintained by Microsoft. Java is somewhat more vulnerable to it because its greatest strength–an open, platform-independent architecture–is inherently dynamic and fungible. Unfortunately, the language’s original developers didn’t foresee and/or adequately address this issue, so today we face the unenviable situation in which many existing applications cannot, for all practical purposes, be updated to the latest greatest (and more secure and supportable) libraries and language core because the change would simply be too expensive. The best solution would have been to build right into the language some mechanism for guaranteeing backward compatibility to all libraries, forever. Then the compiler could simply choose the latest version of every library it could find and it would be guaranteed to work so long as the application didn’t require functionality newer than the available version. Even that could be addressed by a centralized repository and automated system to permit the compiler to go find what it needs. Alas, that seems reasonable today (though it would be more problematic than it sounds) but it was impossible when Java first appeared.

Still, changes have been gradually made to improve the situation. One of these is that at a certain point, a rule was instituted that dependencies had to be unambiguously specified. Throughout the first 8 major releases of Java, this was not the case. You could reference two libraries, one of which had been compiled with the other, and the two different versions of that other would be equally available to the compiler and runtime. Not only would this make your application code larger, it meant that which library was used at runtime was a bit of a crap shoot. Mechanisms were in place to let you take control, but in the vast majority of cases, developers ignored them except when testing found a specific problem.

Do you know what programs that appear correct because of testing are called? Miracle programs. In theory at least, programs should be provably correct, like mathematical proofs. That’s not often the case in practice, but at the very least, we should avoid practices that necessarily increase the odds of hidden defects. Allowing random resolution of multiple library versions is one such practice, so starting in Java 9, it’s no longer permitted.

This brings me here today. I’m working on a novel design application derived from an open-source Java project originally developed in Java version 7. It contains lots and lots and lots of these “transitive dependencies” as they are called. When I try to compile it under Java 9 or higher (16 is the current version) I get almost 300 errors stating “Package such-and-such is available from more than one module…” This wouldn’t be so bad if the IDE (Eclipse) or build tool (Gradle) contained a nice little hook to let you right-click, resolve the problem and move on–you know, the way normal people would do it. But this is Java, so normal people need not apply. In fairness, it’s not JUST that the Java and open-source communities are arrogant twits who see no problem in requiring others to master arcane technical skills to accomplish simple, obvious tasks that should be baked into the interface. It’s also that very often, they also lack the resources or authority needed to bake-in such features, and that’s why we are stuck in a world dominated by Microsoft. But I digress…

MAKE A COMPLETE BACKUP OF YOUR ENTIRE PROJECT DIRECTORY BEFORE BEGINNING.

KEEP A RECORD OF EACH CHANGE YOU MAKE. YOU WON’T BE ABLE TO COMPILE AND TEST UNTIL ALL ERRORS HAVE BEEN REMOVED, SO THERE’S  A POSSIBILITY OF RUNTIME ERRORS CAUSED BY CHANGES MADE TO REMOVE COMPILER ERRORS.

DO NOT TRUST SUDDEN LARGE REDUCTIONS IN ERROR COUNT. THIS MOST LIKELY MEANS ECLIPSE HAS REVERTED TO A LOWER COMPLIANCE LEVEL AND MAY BE LYING ABOUT IT. CHECK THE COMPLIANCE LEVEL. PERFORM GRADLE AND ECLIPSE CLEANS. REVERT LAST CHANGE. RESTART IF NECESSARY.

REMEMBER TO MANUALLY SAVE CHANGES TO THE BUILD FILE. FORGETTING WILL LEAD YOU ON A MERRY CHASE WHEN ERRORS DON’T DISAPPEAR WHEN YOU EXPECT THEM TO.

So here’s how to resolve the problem in Eclipse and Gradle:

  1. Go to the command line and change to the folder containing your application. You can grab this in Eclipse by opening Project/Properties/Resource/Location.
  2. Run the command “gradle -q dependencies”
  3. Copy the resulting report and paste it into a searchable editor (like Notepad++)
  4. In Eclipse, go to Project/Properties/Java Compiler and change the compliance level to Java 9. It’s probably best to leave the workspace settings alone for now, as you’ll want to switch back and forth a lot to make sure you haven’t broken anything as you proceed. At least in my version of Eclipse, the compliance level gets set back to Java 1.7 (version 7) after almost every build, for which I thus far have no explanation. Change it to 9 (or higher), apply and close, and the project will build with Java 9 compliance. You’ll see a large number of “such-and-such cannot be resolved to a type” error caused by the failure of library import statements that no longer work due to transitive (or other ambiguous) dependencies.
  5. Double-click on any of these errors, and a related source code (Java) file will open. Go to the top, then scroll down until you see imports that have been flagged with the message “Package such-and-such is available from more than one module…”
  6. If you see an import ending with a wildcard, skip it for now, find one that’s a specific type.
  7. Highlight the type and press control-shif-T to open the type viewer (in Eclipse). You should expect to see multiple .jar files listed. The type viewer tells you exactly where the file is, but that’s not actually helpful. Instead, you need the name of the library (group or module), usually indicated in the filename of the jar. We are going to try to eliminate from this list all but one of the dependencies, preferably one with (jre) beside it because that’s a supported part of the Java language itself.
    1. First, search your gradle.build file–the one written in Groovy script and containing at least a “dependencies” section  and multiple “implementation” lines.
    2. If one of the multiple depencies is referenced here, you can try just deleting it (comment it out though, so you can bring it back if needed).
    3. Save the build file and use Project/Clean to clean and rebuild. If all errors dissappear, it probably reverted the compliance level to pre Java 9. Use Project/properties/Java Compiler to change it back to 9 or higher, apply and save, and see what that does.
    4. If the total number of errors has gone down, that’s a good sign, but even if it hasn’t, you can go back and look at the same type in the type viewer and you should see one fewer dependencies. Repeat until there is only one and the error count is down by at least one. Fortunately, fixing this issue anywhere fixes it everywhere, so the error count can go down by tens or more all at once.
    5. IF THE ERROR COUNT GOES UP, comment the dependency back into the build file and try something else. The idea is to find a library that contains a redundant reference to another, usually more generic library, and either eliminate it (the library containing the reference) or add an exclusion removing either the entire redundant dependency or better yet, the specific redundant dependency added by that library. Put another way, if your application requires library “A” and library “B” but is failing because “A” contains “B” and Java already contains “B”, you need to tell the runtime and build tools to ignore the version of “B” contained inside “A”.
      1. Search the dependency report you copied earlier for references to the problematic library. This will give you clues as to which listed dependency may be including a redundant (transitive) reference.
      2. If you can omit a dependency that includes the problematic transitive reference and get away with it, great.
      3. If you can’t, you might be able to add an exclusion at the bottom of the build file something like this one for xml-apis (though I haven’t worked out the details of how best to use this, I found it following an online thread):
        configurations.all {
        all*.exclude group: ‘xml-apis’
        }
      4. Or better yet, you can specifically exclude the transitive dependency brought along by some other needed library. That library will still use the code it brought with it, but the compiler and runtime won’t see it on the classpath and get confused.
        // Apache Batik
        // implementation ‘org.apache.xmlgraphics:batik-dom:1.8’ // CSH exclude added for Java 1.8 to 9 update
        implementation(‘org.apache.xmlgraphics:batik-dom:1.8’)
        {
        exclude group: ‘org.apache.xmlgraphics’, module:’batik-ext’
        }


Open Libreoffice Writer to the Last Edited Document

More people should be using LibreOffice. Why? Because word processing is a mature technology, as mature as the doorknob, and there is no reason to keep paying tech companies like Microsoft increasingly exorbitant protection money as if we needed or wanted them to “improve” it–all the while making it easier for them to spy on us and sell us crap we don’t want. Capitalism is a powerful driver of progress, but sometimes that progress is, as C.S. Lewis put it, called “going bad.”

This isn’t 1988. Word processing doesn’t need anything but bug fixes and refinement between now and whenever the next revolution in AI or human biology renders the whole idea moot, and well-supported open-source software is safer than commercial software specifically because it’s open. More eyes are looking at the code with more detachment. It’s also a bit like a good Credit Union, driven by the needs of the community rather than the profits of a few oligarchs. So stop paying that monthly subscription and download LibreOffice for free. Go. We’ll wait.

But when you do, you’ll naturally find there’s a learning curve. That’s where I can help. I’m starting a series to share what I’ve learned as I’ve made the transition over the last decade or so.

In this post, the Libreoffice Macro facility and how to easily use it to do something super useful with no difficulty at all: Make Libreoffice Write open the last document you edited to the last spot you were at when you closed it.

Read More

Translate 13,000 Application Strings in One Shot

In a browser, Modern computer applications contain thousands of text strings used within the user interface to populate help text, buttons, dialogs, and other controls. Localization is used to swap these text strings out for those appropriate to other languages so the application can readily adapt to users around the globe. This post isn’t about how that’s done but about a method for addressing the single greatest weakness of localization–getting all those strings translated into every language supported by the application. Generally, they’re stored in properties files of one form or another and sent out to language experts (or volunteers) for translation.

This quickly becomes a logistical nightmare nightmare, and unless each translator is very adept, and every translations is made in the context of the application, results can be mixed. It’s a lot of work and can be a great expense that many smaller developers simply can’t afford, meaning that many applications simply don’t support as many languages as they might, or support them as well as they should.

Read More

You Gotta Have Skills

Since I started seriously writing, I’ve learned there are a vast assortment of skills I might logically profit by that I just don’t have. And I’m not talking about grammar and spelling, or judging when to use active voice or how to write dialog that sounds true to life but isn’t as dull and repetitive as life—though those are all on the list.

No, I’m talking about the meta-skills, the things writers need to know these days that have nothing (or little) directly to do with writing, skills like using software to create promotional signage and book layouts, reading stories before an audience (or into a microphone for audiobooks), hawking your wares from a comic con booth or yes….begging for money.

That last might seem an odd choice for someone like me with major contest wins and a string of top market professional sales under my belt. But the sad truth is, short stories just don’t pay very much, and unless you hide all the other writers in a cupboard somewhere, it’s almost impossible to sell more than a few per year at professional rates.

So…as I work on the core skills (the prosy ones and the butt in chair, actually writing the novel ones) I started thinking a few years back, that it would be wise if I had a plan in place, should the need arise, to convince the IRS that yes, this writing thing really is a business that will one day turn a net profit after appearances and expenses.

My first step along those lines was to create Got Scifi Group, a small imprint and informal collaborative of some of my award-winning writer friends, for the purpose of producing anthologies that those of us who make appearances and don’t yet have a back list of novels can sell at a measurable profit.

Read More

And Now For Something Completely Different

So I built a couch this week–one of those Home Reserve sectionals where all the parts are made on a CNC router and you have to put them together jig-saw style. I’ve never been a fan of “flat-pack” furniture, but with advancing technology, it’s lost most of the deserved stigma it once had.

Read More

Make Your Website Shine!

Sprucing up your website for the new year? Now’s a good time to consider how it looks and works on mobile devices.

According to my stats for 2016, a quarter of my followers now arrive on mobile devices. I work hard for their patronage, and I want to ensure their experience is as pleasant as possible, but there are a huge variety of devices, resolutions, and user settings to contend with–and it all takes time away from writing. What to do?cellphone-use

Fortunately, the days of testing software out on every possible client configuration are long gone, and for the casual brochure site(1) developer, most of the heavy lifting has already been done. I use a paid Weebly account for my brochure site and a free WordPress site for my blog

Read More

The Ergonomic Treadmill Desk

In March of 2013, I switched from an extremely fatiguing standing desk to a simple, effective, DIY treadmill desk. By August, I was so pleased with this arrangement that I invested in a substantial upgrade.

Since then, I’ve had my ups and downs. The treadmill desk was a boon. I soon learned to cope with static electricity and blisters and  to typing at a jaunt, and by the end of 2013, I was down to what I weighed on my wedding day. An injury forced me to lay off for a few months, but I eased back in and the beginning of this summer, I had run into a new problem.

My keyboard wasn’t cutting it.

If you follow any of my social media whatzits, you know I recently bought a Kinesis Advantage ergonomic keyboard.

Now, as Bryan Thomas Schmidt pointed out on Facebook, learning a new keyboard can really piss you off, but I went through some typing training and have found the Kinesis extremely compatible with continued touch typing on an ordinary QWERTY keyboard, and that it’s really those inferior layouts that annoy.

So the old execrable Microsoft keyboard went into hibernation, and the treadmill desk got a makeover:newdesk.jpg

This clean design replaces the slightly too-high, non-adjustable, hardware store wire shelf upper deck with a $30 Allsop Redmond adjustable notebook computer stand.bending.jpg

After playing with it for a few days, I found it a bit too tall at its lowest setting, so I just crushed the arms down a bit and voila.

Poplar veneer plywood, screwed to the stand, extends the new upper deck to accommodate a mouse beside the keyboard (I prefer the left). Black, non-slip shelf liner, securely attached with Scotch Poster Tape, gives both surfaces a neat appearance.

My Logitech T650 trackpad fits neatly and securely in the center of the Kinesis:DSCF5249And the mouse is easily swapped out for the Wacom tablet when it’s signature time:

wacom

And there you have it. It works great and I can type all I want, as fast as I want, without any hand pain, though I do need to make a little ramp to give the mouse a surface closer to horizontal.

I know the treadmill thing isn’t everyone’s cup of tea, but I hope these posts give you ideas that you can use in your own workspace. If they do, leave a comment and let me know about it.

Cheers!

ErgoDox Like a Kinesis

Want your ErgoDox keyboard to feel like a Kinesis? Sure you do. Read on.

This is a long how-to post. If you want to skip over the “why” and go right to the “how” jump to the last section.

In this post:

The Field:

Many aficionados of ergonomic keyboard design believe the Kinesis Advantage is the finest ergonomic keyboard ever made.

It may look weird, but I can state from firsthand experience that those oddly warped key wells and offset thumb clusters really do fit the human hand far better then any other keyboard I’ve used, and the Kinesis, remappable and available with two types of switches, a variety of key cap options, and  out-the-box QWERTY and Dvorak layouts, is a joy and revelation to type on.

It even supports a foot pedal you can use for say, a shift or control key (cool but I use a standing desk.)

But now, thanks to the rise of maker culture and the open source community, there is a new contender for the throne: ErgoDox.

Image result for ergodox

ErgoDox EZ with tenting kit and blank key caps.

ErgoDox lacks the form-fitting key wells of the Kinesis, but makes up for it with some interesting features. For a start, it’s smaller and more portable, it allows users to customize spacing between hands and the orientation and “tenting” of each hand.

Many people choose ErgoDox just for this flexibility, but in addition, it’s an open source design, so you can custom-build your own from scratch, assemble a kit sold through MassDrop, or buy factory assembled units from ErgoDox EZ. You could also take inspiration from the ErgoDox open source design and come up with something new of your own (Keyboardio is coming out with a very similar, but non ErgoDox design you might find interesting).

This is customization almost unparalleled in the history of consumer goods. You can choose from a bewildering array of keyswitch types, keycaps, and keyboard layouts. One fellow skipped ergodox_keyboard_mod_with_trackball_2_2013-04-17
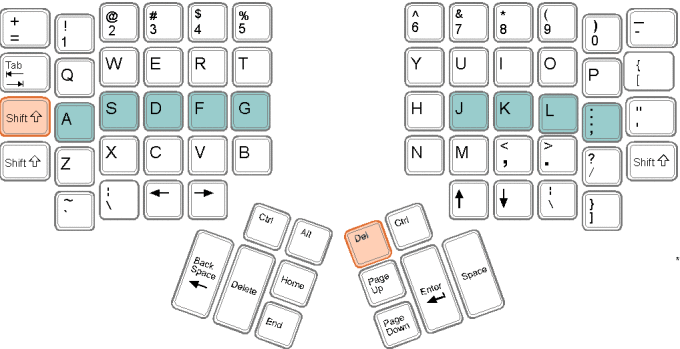
the ErgoDox controller and instead soldered each of his two half keyboards to wireless keyboard controllers hacked from a pair of cheap Logitech wireless keyboards and synced to a Logitech Universal USB dongle. Others have mounted their ErgoDox into a homemade housing with a trackball in the middle. To each his own, literally.

Me? I bought a commercially available unit from ErgoDox EZ. This is your standard design in a top quality ABS plastic case, with ingeniously designed tenting feet. I bought it with a blank keyboard for a couple of reasons.

First: due to economic constraints in the manufacture of keycaps, you pretty much have to choose between flat printed keycaps and sculpted blank keycaps. Sculpted keycaps have different heights for different rows, slightly more ergonomic and more like the Kinesis, but it’s not economically feasible for manufacturers to make printed sculpted keys given all the height-label combinations.

Two: I’ve been touch typing since I wrote my own typing instruction program in high school. Typing on a blank keyboard is only daunting at all because control keys vary from keyboard to keyboard. So as long as I configure my ErgoDox EZ to have the same layout as the Kinesis, typing on blanks should be fine. Typing on labels that don’t match the keys, however, would drive me batty.

So I got the Kinesis first, carefully adjusted my workspace to minimize wrist strain, and used a free typing instruction program to cure some old bad habits and train a few keys I never quite learned by touch (I’m looking at you, queball.)


Changes I made to my Kinesis layout:

Kinesis is fully remappable (and even available with Dovorak keycaps) but I’m sticking with QWERTY (which is really called Sholes) because that’s the defacto standard, I have to live on Earth, and it makes very little difference anyway as far as speed and accuracy. I also am pretty conservative when it comes with customizations, just because I’m lazy (laziness being the highest achievement of human civilization) and any customizations I make, I will sooner or later have to support.

1> That being said, there is one key that needs to be banished from any

200_s

“Mind your step, sir.”

computer keyboard before it’s fit for human use. That would be, the excrementally anachronistic caps-lock key. Now, there are those among you who will defend this old standby, and to you I say STOP YELLING at me! A computer needs caps lock key like an elevator needs an attendant to open the door for you.

We have styles! And electricity!

To the touch typist, caps-lock is nothing but a land mine you hit when you overshoot the “A” that then ruins the next few words and throws you out of the flow. Many people remap caps-lock to be an additional control key, but that’s even worse. Hit it by mistake and you’ll knock the computer into some alternate mode of operation and do no telling how much evil. No, the only safe thing is to just turn it into another shift key and be done with it.

2> Also, I’ve never seen much point in the OS key, a key that, let’s be honest, only displays a menu you are going to select from using the mouse. I do like having a delete available to the right hand, though, so done and dusted.

My Kinesis Customization


Changes I made to my ErgoDox layout:

The ErgoDox also is easily customizable–so much so this could easily be daunting. Where the Kinesis just toggles between the normal and keypad layers, ErgoDox can define multiple layers. Where Kinesis lets you easily reassign any key from its standard position to an alternate location just by hitting a few buttons, ErgoDox lets you remap the whole keyboard using a graphical editor. Heck, if you want to, you can download the firmware source code and program it to recite the Star Spangled Banner by flashing the LEDs in Morse Code.

I opted for the simple approach, using the free GUI configurator to set up a Kinesis-like  layout. Below I’ll show you how easily you can do the same, but first, here’s the layout:

ergolikekinesis

Kinesis Emulating ErgoDox layout


Notice, the ErgoDox has some extra keys. Two extra columns are placed above the thumb clusters, and I’ve used these to enhance media control and editing. I put the mute on the right so that I can comfortably alt-tab with my left to switch applications. Later I might consider building a firmware image from source code to use the ErgoDox’s tap-hold functionality, but for now it’s not worth the bother. I put extra delete and backspace keys on the right too since I know my error rate will be higher on this keyboard.

The additional lower left key is used to restore the OS key (which actually works and is all but essential in the version of Fedora I run on my laptop

where I plan to use ErgoDox). The lower right key is used to load layer 1 (the above is layer 0).

ErgoDox has extra keys but is doesn’t have any function keys. These are occasionally needed, so I’ve placed them on layer 1, and the numeric keypad on layer 2 (see my full config on MassDrop for details on those layers).

* If you must know, I do have a caps-lock key on layer 1, where it’s a good deal harder to hit accidentally.

ErgoDox supports layers using a stacking metaphor that frankly, is only going to confuse you when you try to use it. Instead, just remember this: the lower right key advances from the alphabet layer to the function key layer and on to the num pad layer. The lower left key, on any layer but the alpha layer, returns to the alphabet layer.

There. Simple. Now I can move back and forth between my Kinesis and my ErgoDox with the minimal possible change to the touch-typing experience–and so can you.


How to configure your ErgoDox to feel like a Kinesis (it’s easy):

These instructions are for the ErgoDox EZ but should work equally well on any ErgoDox using the Tweensy controller.

  • Download my ergodox_firmware.hex file to your computer.
  • Download the Teensy Loader app most appropriate for your operating system.  This is the tool you use to upload the keyboard layout to your ErgoDox.
  • With the ErgoDox plugged in, run the Teensy loader program.
  • Press the “Teensy reset button” with a paper clip. On the ErgoDox EZ, this is a tiny hole in the upper right of the right keypad. You can configure a key to act like pressing this button, but honestly, why?
  • Drag and drop the ‘.hex’ file onto the Teensy loader window.
  • In the Teensy loader, click the “Auto” button. You should briefly see a progress bar as the update is loaded to your keyboard.
  • I’ve seen other instructions for doing this that involve more steps (and may possibly be the result of needless complication). If you find that my instructions don’t work, please leave a comment.
  • That’s is. If for any reason the keyboard doesn’t work after this, just unplug it and plug it back in. You’re updating the keyboard layout data, not the firmware, so there is only so far it an go wrong.

I make no guarantees or warranties, of course, but it’s pretty bullet proof. If you run into any trouble, ErgoDox EZ has links to all the support info you could ever want on their site.

Let me know how it works out in the comments.

Cheers.


Other resources: